- « Previous blog
-
WP Event Manager
-
June 5, 2020
-
October 2, 2020
-
860
-
0
- Next blog »
How do they work together to create an event website?
Over the past decade, the trend and need for a website to boost your business has risen to a new and essential level. That’s why you will find a lot of websites whenever you’ll search for anything. WordPress Event Manager Elementor works together to create an amazing website for event planners and managers.
WordPress is probably the most advanced and accepted Content Management System, which modern Businesses are using to develop their websites. The story’s not finished yet; it also provides you services like Hosting, SSL certificate acquisition, and likewise. An amazing aspect of WordPress is that it comes with a lot of Plugins.
A Plugin is a bunch of code lines that are developed by expert developers and been presented to a layman. The Person just needs to download that plugin, activate it, and enjoy any particular functionality which that plugin imparts to the Website. These plugins have made it easier for the layman to design and develop amazing websites without becoming a developer.
WordPress itself offers quite a few Plugins which are mostly free, alongside plugins by foreign communities. WooCommerce is an example of it and is used to develop an eCommerce store. Recently WordPress launches a new plugin, and it’s WordPress Event Manager Plugin.
WP Event Manager
WP Event Manager Plugin helps you to integrate basic, yet a highly efficient Event Management System to your Website. With a few clicks, you can turn your website into an Event Management portal. The Plugin is enriched with multiple features, a few of them are
- Create, Manage, and Categories your events through highly user-friendly and familiar WordPress UI.
- Highly efficient search and filter options.
- Cross Browser Support and SEO friendly.
- Event Categorization
- The plugin comes with a feature enriched Widget Library as well. These widgets include event listing, assortment, and likewise.
- The most amazing bit is that it’s FREE.
WP Event Manager – ShortCodes
ShortCodes are like snippets of the code which are generated whenever you integrate the Event Management Plugin with Elementor or any page building Plugin. When a widget of Management plugin is selected, a snippet is generated by it, which in turn needs to be placed at the section of the website, where you want that particular widget to work.For further information about WP Event Manager shortcode, you can visit here in Knowledge Base.
Elementor Page Builder Plugin
Another amazing plugin of WordPress team for the community is Elementor Page Builder. If you’re familiar with WordPress based Website development, you must be familiar with Elementor as well. This Plugin is a website page builder. On the backend, it creates a set of code, comprises upon page designing elements, which in turn helps you to create a web page.
In general, a page builder plugin works alongside every other plugin been added to the Website. Rather, it won’t be wrong to say that most other plugins are added inside different elements or Widgets of a Page Builder. Similarly, WP Event Manager Plugin would be integrated with the Elementor Page Builder Plugin to create our online Event Management System on our
website.
It’s good that by now you have decided to make your web-based Event Management System, but you might not be acquainted with the procedure. This brings us to the main reason behind this article, that’s to guide our readers on how they can use both of these plugins to get an effective and efficient Event Management System.
Construction of Event Management System
- Start with the purchase of the Domain Name and Hosting. There’re a lot of service providers, present on the internet. Find out which of the plans to suit your requirements.
- Download the WordPress files from www.wordpress.org.
- Install the WordPress files and integrate them with your Hosting.
- After that, run into the WordPress Dashboard and start from creating pages and add the required plugins.
Elementor and WP Event Manager
- The process to download and install both of these plugins is the same.
- Go to the Plugins Section. Click Add New and enter “Elementor” and “WP Event Manager” to download the respective Plugins.
- After downloading, go to the list of Plugins, check the box of both Plugins and go to the above button of “Bulk Action” and click it to select the action of activating both plugins, simultaneously.
Event Management System Development
The Process initiates from the activation of Elementor Plugin. The pathway, as mentioned above, is quite easy for you to activate it. It’s been summarized as
- Go to WP-admin >> Plugins section in admin panel and activate the plugin.
Congratulations! You have successfully installed and activated both plugins. Now the next step is the construction or addition of the Pages to the Website. Just like previous steps, this step is not difficult either.
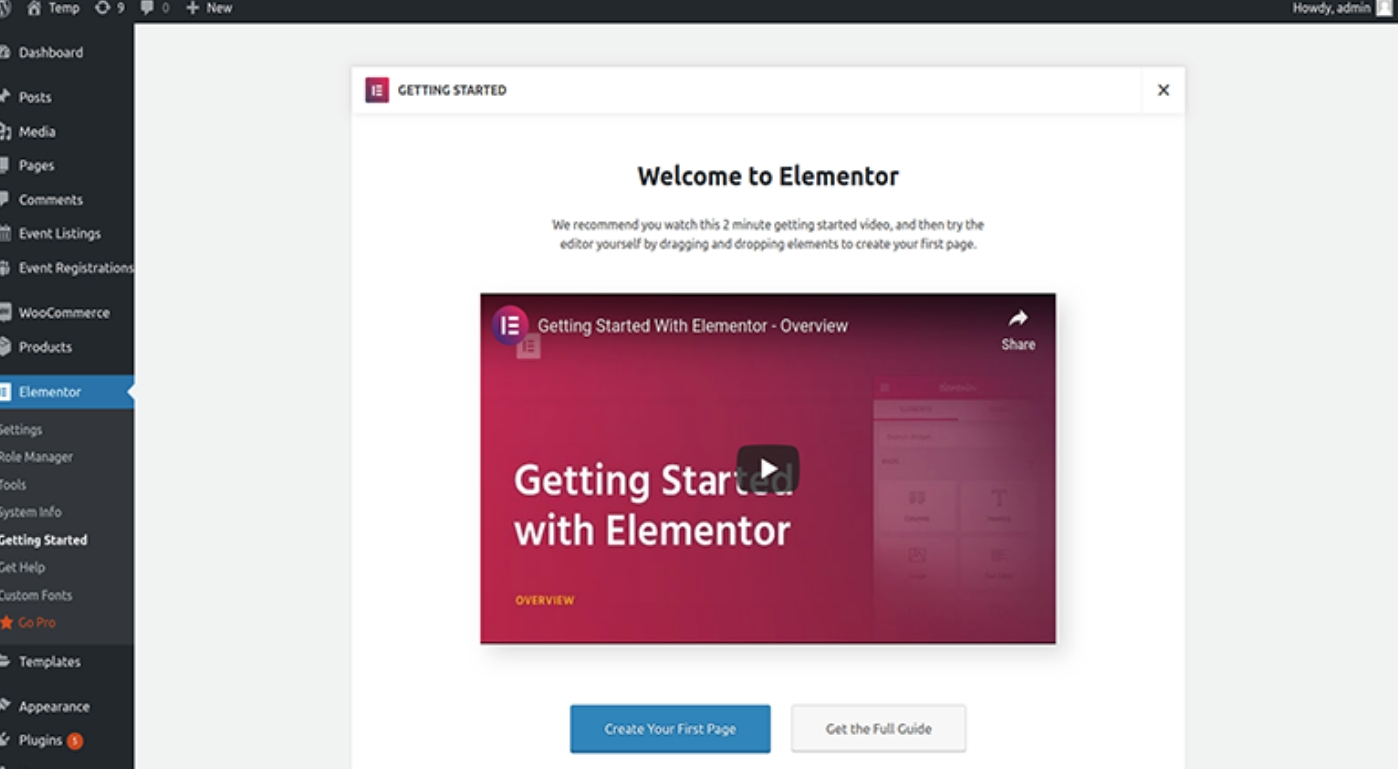
- Go to WP-admin >> Elementor >> Getting Started
Follow the above-mentioned Path. You will be directed towards the following screen.

- Click on “Create Your First Page”
Here at the bottom of the Video Icon, you can find a blue colored button saying “Create Your First Page.” So next, quite obvious, click it and the 1 st page of your website is ready to carry the Event Management Widget.
Amazing! You have done a good job if you have created the page using Elementor. Now it’s time to move ahead.
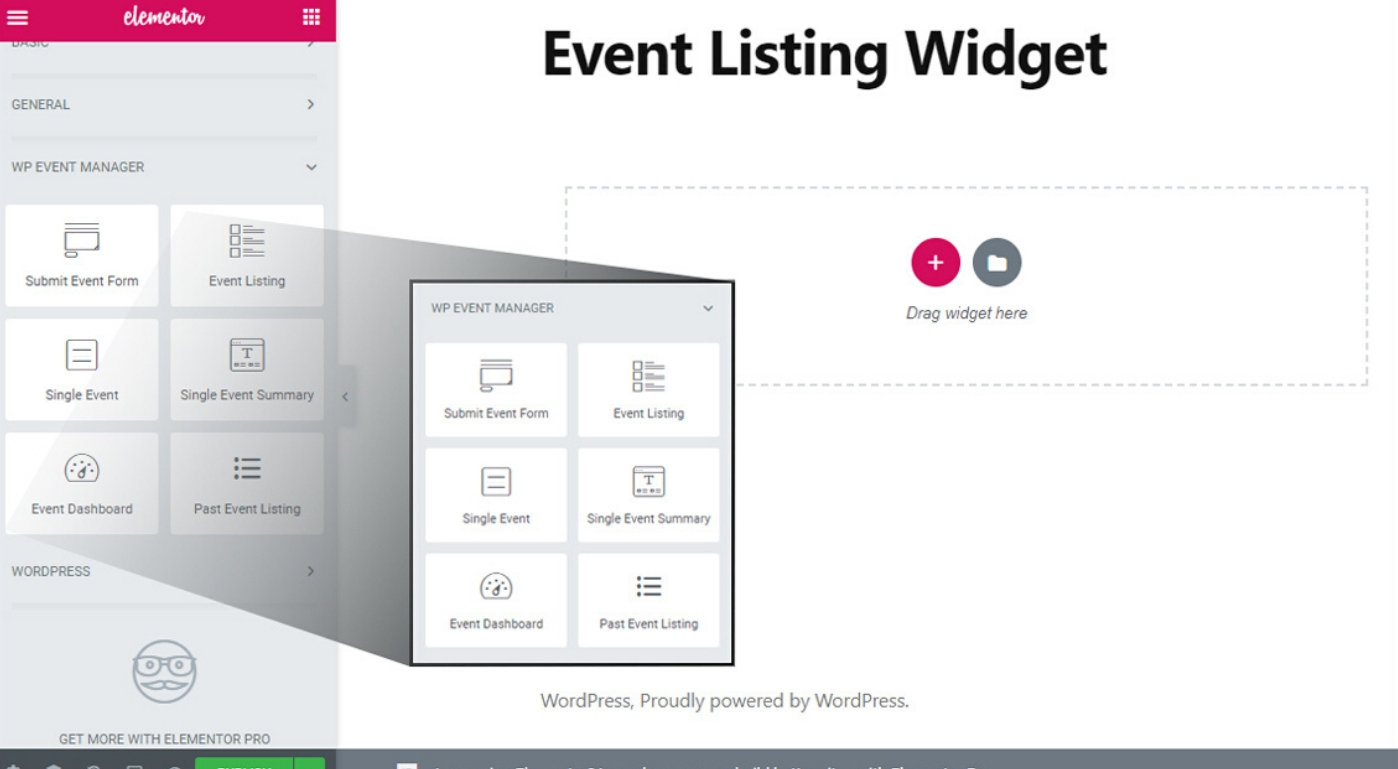
- As soon as you will click the blue button, you will be getting redirected to this page where it displays WP Event Manager Widgets.

After clicking the “Create Page” button, you are now at the Widget panel page. From this page, you will now start to have an idea that we are close to our web-based Event Management System. On the left side, you can see various widgets. As mentioned earlier, each widget provides a particular bit or part of the Program.
- Now, just drag & drop the required WP Event Manager Widget into the Page Widget Area and set attribute values related widget. So that’s simple. Isn’t it?
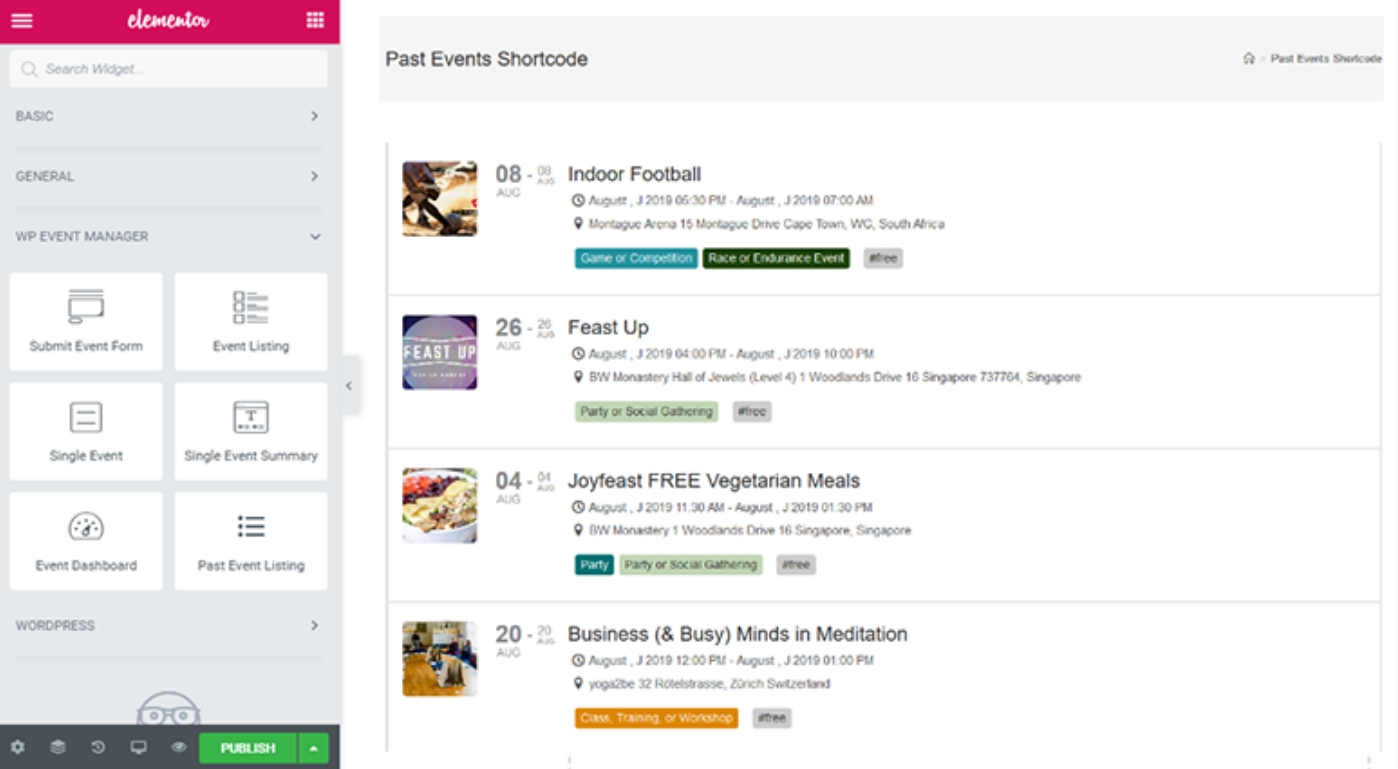
Things are not over yet. We are just a few small steps away to reach our destination. Now, as soon as you drag any of your desired widgets, this will lead you to the following screen. What you will see is a dialog box will be opened. It will require a few relevant fields to be filled. These include different required values, e.g., Category, Date, Location, and likewise.

-
We are almost done here. On the left side of your screen, at the bottom, you can see a green button saying “Publish.” You know the Drill! Click, and you are ready to publish the content on your page.
As soon as you click the publish button, you will be provided with a ShortCode. All you need is to copy that particular snippet and paste it at the section of the page where you want it to appear.
- For example, if you select the Widget “Event Listing.” This snippet lets you view an entire list of events that have been added to the website. The actual code for this excellent widget is [events].
- Another example is that if you select the Widget “Event”. This Widget is self-explanatory. It lets you check or find out any specific event from the list of the event which you created using the snippet mentioned in the 1 st point. The snippet of this widget is ‘[event id = “xxxx”]’
What’s next?
We learn through observation, exploring, and mistakes. This article has provided the basic information to help you develop your Event Management System using WordPress. Now it all boils down to your passion to learn and explore. The more you explore, the more you learn and the more you will be successful.

